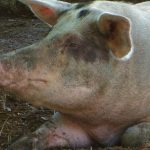
Raising Ducks in Your Backyard

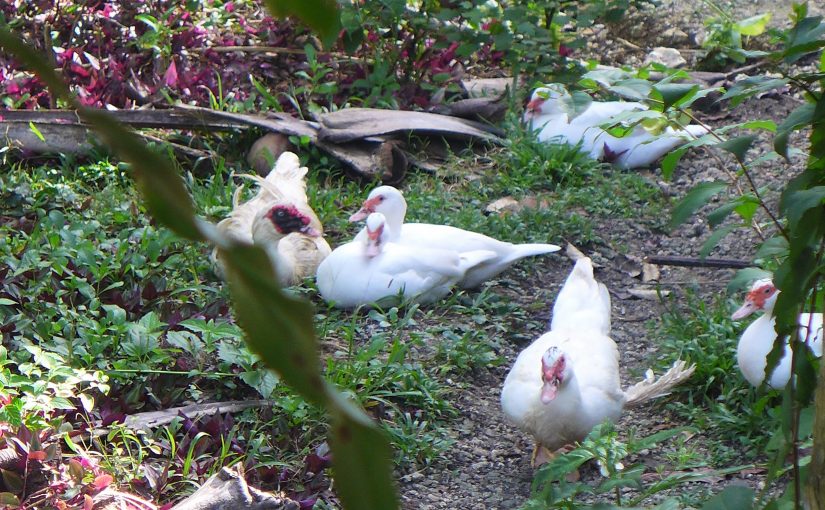
We started with a pair of adult ducks – male and female. We kept them in a bamboo fenced area of about 20 square meters. We clipped their wings so they wouldn’t fly over the fence. We provided a large basin of water for them to swim in. We built a small scrap wood shelter for them too. We fed them chicken pellets, pig pellets, kitchen scraps. Our free range native chickens sometimes ate with the two ducks and we had no troubles with that. We even kept a piglet in that area for a while.

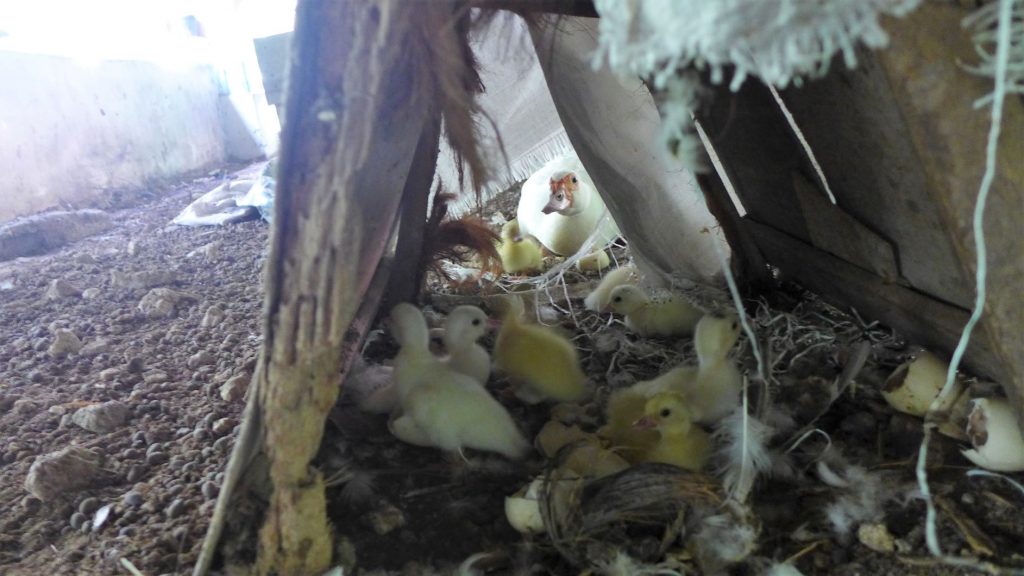
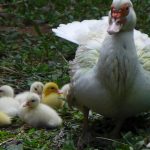
After a few weeks, the hen started laying eggs under the bamboo grove. We got excited! To protect the nest, we placed a roof made of wood and tarp over it. By then the ducks have become accustomed to their new home so we removed the bamboo fence. They roamed freely in an open area of about 1,500 square meters. But they always stayed near where we fed them. After 35 days, 12 ducklings hatched and all grew up to become our first flock of ducks. There were no fatalities.

Should you decide to raise ducks in your backyard, here are some tips to help you get started. These ideas may be suitable for backyard settings with an area of about 25 to 1000 square meters, a natural environment, not concrete, for a flock of 2 to 25 ducks.
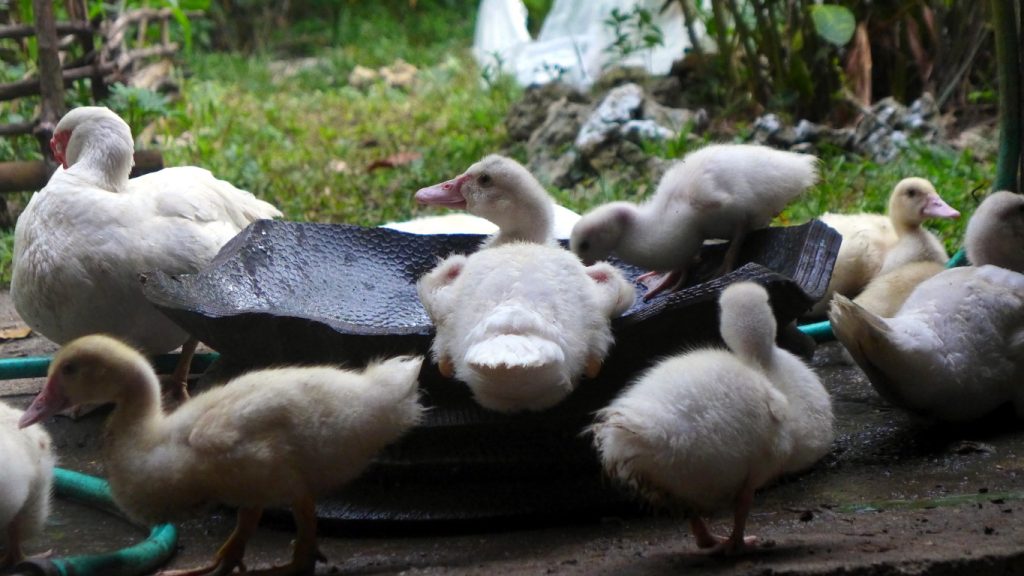
Before Getting Your Ducks…

Plan ahead. Consider the following.

Protect Your Plants

Little ducklings won’t be a problem. But as they get older, from 4 weeks on-wards, they will start feasting on your plants. A group of 6-8 week old ducklings can kill a banana plant, demolish a gabi patch and dig up camote, ubi, singkamas tubers. If you have a leafy vegetable patch, the ducks will eat the veggies. They will kill squash fruits and flowers. So you will need to protect your plants if you want to let your ducks roam freely in your garden.
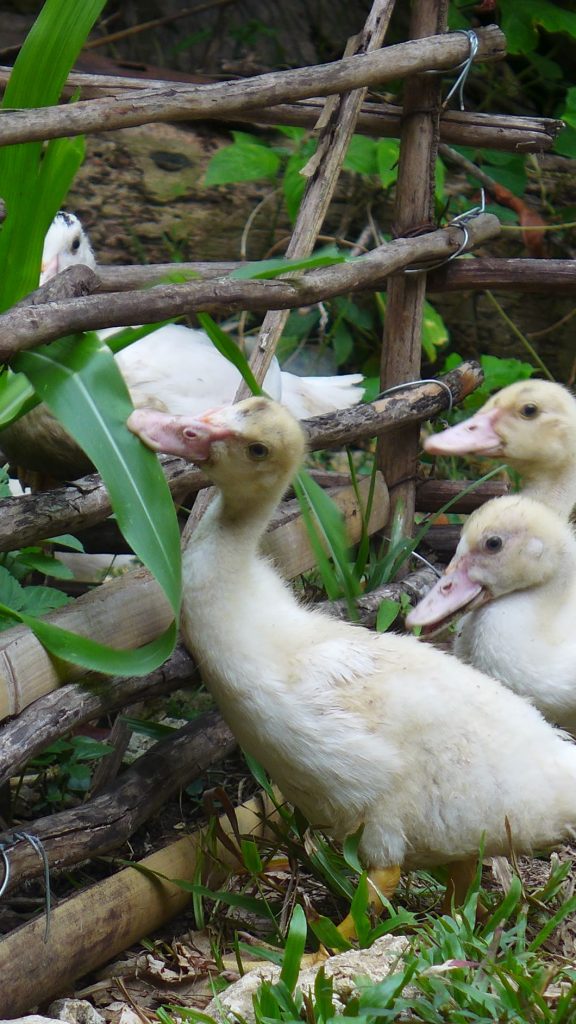
Young ducks attacking corn plants.

Fence your plants with bamboo, scrap wood, chicken wire or netting. The fencing doesn’t need to be very high. A foot high will do. Raised vegetable plots also discourage ducks from attacking. To prevent ducks from attacking the soft trunk of banana and stems of gabi plants, you may also grow thick and sturdy ornamentals around the base of these plants. Twigs, branches, and mulch from grass and dry leaves may also discourage ducks from entering a no-go zone.
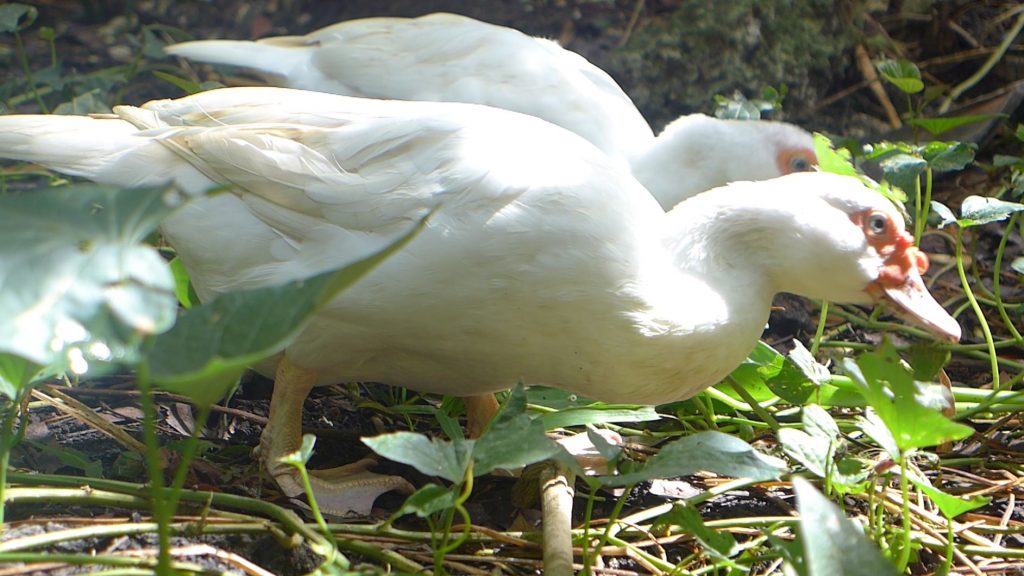
Ducks foraging kangkong and camote tops.

Alternatively, you can fence your ducks in a part of your backyard, away from the most precious plants in your garden. A fence about a foot high should be sufficient. If ducks fly over, trim their wings. Be sure that ducks have enough space to wander around. Unless you have lots of ducks in a small space, they aren’t really motivated or determined enough to destroy most ornamentals. Ducks can’t reach the fruits of shrubs and fruit trees. Grass should be okay, but in a small space with a lot of ducks, grass can be killed by ducks trampling and by the build up of effluent.
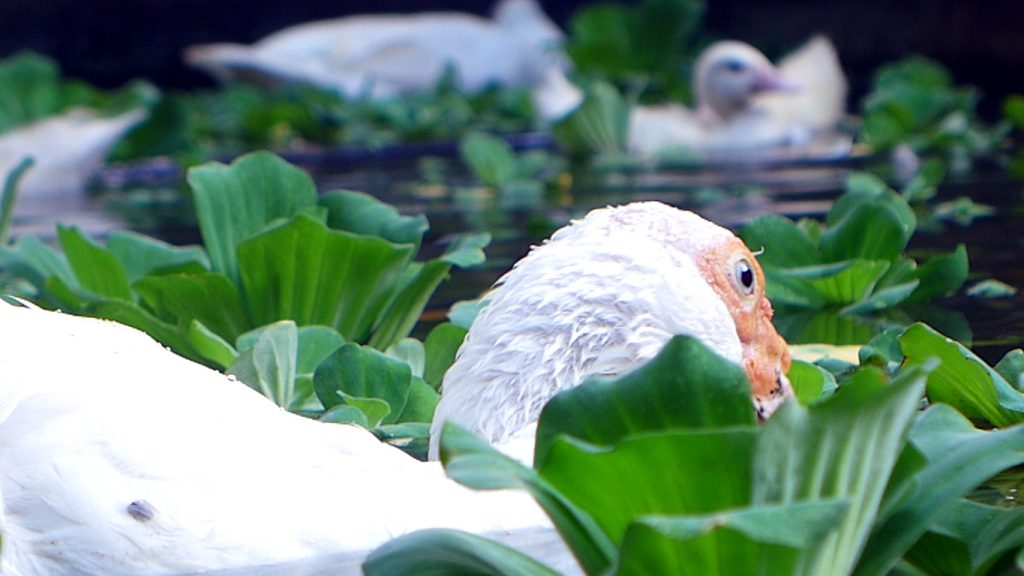
Protect Your Ducks

When you bring home your ducks, they will want to escape and go back to where they came from. You’ll need to get them accustomed to their new home. You can do this by caging or fencing them in your preferred location for the first 2-4 weeks. Ducks will stay where they are fed, watered and treated well.

At the same time, caging or fencing will protect your vulnerable ducklings from predators such as cats, dogs, large lizards, snakes and birds of prey.

Food and Water

Give your ducks and ducklings water as soon as they arrive. After an hour or so, you can start giving them food. For ducklings, chick booster pellets, crumble or piglet starter is fine. Don’t give pollard, hog mash or rice hull. It will clog up their crops and kill them. If you notice something is wrong with their crops, give them a bowl of sand and water. The sand may help them unclog their crops.

Adult ducks can eat commercial duck feed. If duck feed isn’t available, chicken or pig pellets is fine. Kitchen scraps, grated coconuts, hog mash, pollard, azolla, duckweed, banana trunks, de-boned fish trimmings, etc. are all fine. Ducks also eat mosquitoes and other insects. Give the ducks a varied diet, not just commercial feeds. If you have lots of surplus food, you won’t need commercial feeds at all.

Basically, ducklings and young ducks will need 18-25% or more protein in their diet, while adult ducks can do fine with 12-14% protein.

Feed adult ducks twice a day – early morning and late afternoon. Ducklings can be fed three times a day. However, ducks will look for food almost all day.

So, to keep your ducks away from your plants, you can give them something to forage on. Look at what you have in surplus. Papaya? Bananas? Coconuts? Just cut them open and leave on the ground for the ducks to find. We love coconuts – we cut them open and leave on the ground and the ducks will spend many happy hours on those. The coconuts will also attract flies and other insects which the ducks will love to eat.


Rest and Recreation

It is imperative that you provide water for bathing. Ducks need to clean themselves and swim. In a small backyard, a basin of water will do. A plastic container cut in half also works fine. Have several of these if you have lots of ducks. Larger yards can have a pond built especially for ducks. Design ponds that have drainage or overflow and are easy to clean. Duck ponds can be 6 inches to 3 feet deep or preferably sloping, and should be about 1 square meter area per duck.

In this video (below), we use the shallow plastic lid of a bucket as swimming basin for ducklings. There are 8 newly hatched ducklings with their mother. Don’t use a deep basin in such a case. If you do, the mother will attempt to swim in the basin and she will crush and drown her ducklings. If you want the mother to swim with her ducklings you must build a pool that is large enough for all of them.

In this video (below), a duck bathes in a tray of water. This shallow basin poses less danger than a basin that is deep. Ducklings can get trapped and drown in a deep basin.

Nesting

Ducks will mate and start laying eggs at around 6-8 months of age. They will look for nesting places in their environment. In our experience, ducks will lay their eggs on the ground away from view. They will not lay eggs in elevated nesting boxes lined with cloths, sacks, dry grass etc. like chickens do.

In these photos (below), we use scrap wood as nesting houses for ducks. Our ducks love these. We have nesting houses under the house, under the dirty kitchen and under a bamboo grove. Put nesting houses in locations that don’t get flooded.
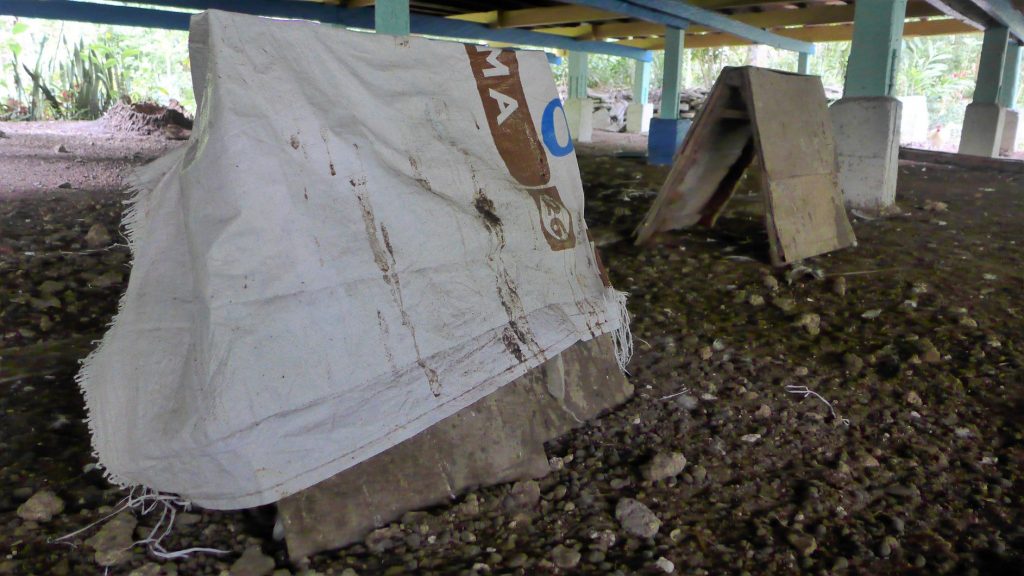
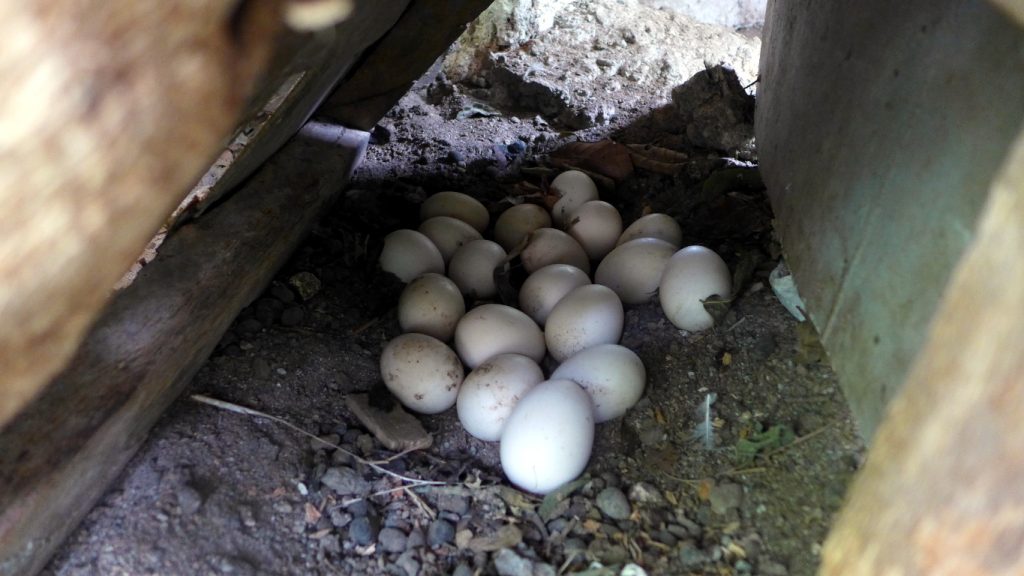
 

A brooding duck hen is very vulnerable. Give her privacy, keep her nesting area secure, away from aggressive drakes and predators. If snakes and monitor lizards are a constant problem, you may need to secure the entire duck area with netting. If you have an aggressive drake, separate him from the vulnerable hens and ducklings. A hen will sometimes kill her newly hatched ducklings if she feels threatened.

In the photo below, a duck has made a coconut tree stump as her nest. This wasn’t a safe place because it is frequented by monitor lizards that eat duck eggs.
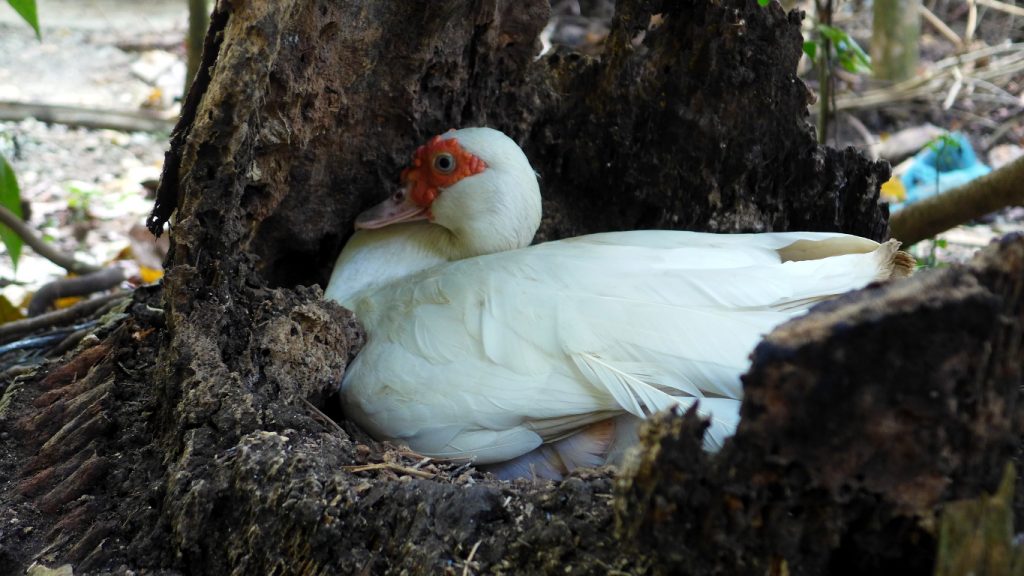
Ducks have different rearing behaviours, some make very good mothers while others don’t. Most ducks make good mothers if kept in a safe environment.

Duck Behaviour and Socialisation

When introducing new ducks to an existing flock, segregate the new ducks for a while. If you introduce a new drake to a flock with a drake, they will fight to establish hierarchy.  The advantage of a large backyard space is that ducks can flee from aggression and the likelihood of injury and fatality is minimised. Once hierarchy is established there will be very little if any fighting.

In the video below, if there is ample space, ducklings can escape from aggression.

Ducks are notorious for their aggressive mating behaviour. Drakes can kill duck hens and her ducklings. If you have a flock of ducks, don’t let the hens sit on eggs or rear ducklings all at the same time. There will be no hens for the drake and he will attempt to mate with brooding hens, breaking eggs and killing small ducklings.

In our experience, ducks socialise fine with native chickens in a free range environment. As long as there’s enough space, animals can escape from fights and aggression. Otherwise, they get trapped. Native chickens can be quite aggressive – in fact, they are much more aggressive than ducks. A hen with chicks or a rooster can peck a small duckling and kill it. So if you keep ducks in a small confined space, keep them separate from native chickens.

In the video below, a duck protects her ducklings from piglets foraging in the garden.

Messy Ducks?

Ducks are messy. They poop all the time. And the poop is a huge stream of muck. This isn’t too bad on a surface of rough grass and weeds, but can be dangerously slippery on concrete, compacted soil and walkways. I’ve had a few accidents slipping on duck poop. It can get quite dangerous during the rainy season too.
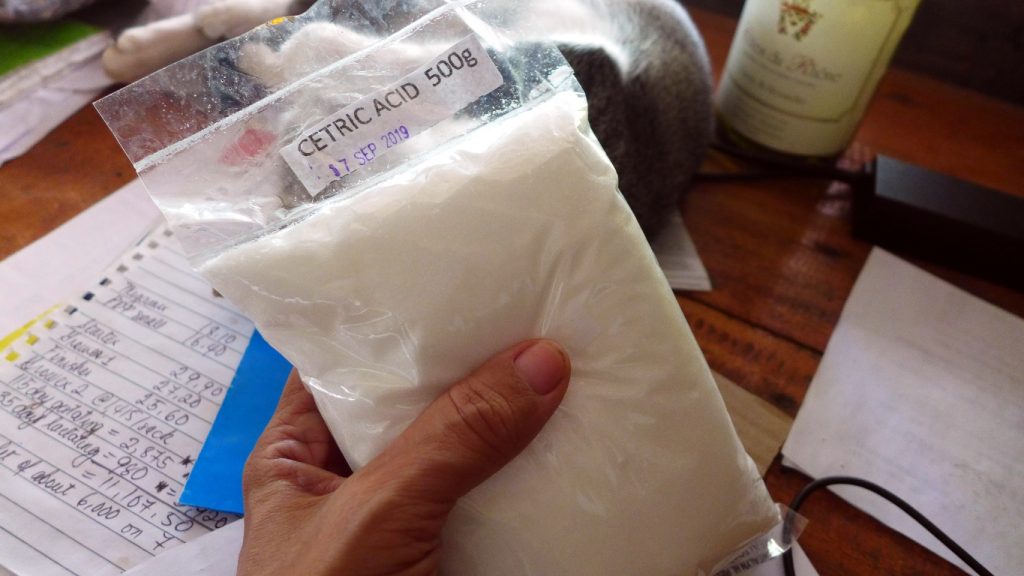
We discovered that one way to minimize the muck is to acidify the duck’s drinking water. We haven’t tried vinegar but what we’ve found citric acid to be quite effective. 1-2 teaspoons in a liter of water seem sufficient, just don’t put more than 5% in the water. Proper acidification improves gut health and digestion, resulting in more solid poop and healthier ducks. It also reduces irritating odors. Experiment and see what works for your ducks.

We also noticed that acidification results to thickening of blood. If you find this a problem when you slaughter ducks (and chickens), withhold the acidification in water for 2-3 days before slaughter.

Disease

Over the past years of keeping ducks, we have never had disease. We never saw the need to use antibiotics or multivitamins. Our duck fatalities were all due to drake aggression, accidental trampling in a feeding frenzy, ducks going into the pigpen and getting eaten by pigs and overfeeding of very young ducklings.

Strangely, we also noticed that since introducing ducks into our flock of native chickens, we’ve had a marked decrease in disease amongst the native chickens. We can only speculate that the ducks have brought in immunity to pathogens amongst our native chickens. We are yet to find studies that confirm or explain our experience.

Good Luck and Enjoy Your Ducks!

As long as your ducks are not overcrowded and are treated well, they should be fine. Ducks are sturdy, very robust animals. They are one of the easiest animals to keep in a backyard setting.

We hope that this bit of information helps you in your backyard duck-raising journey. Just leave a comment if you have any questions and we’ll do our best to answer them.
DIY Domestic Greywater Treatment

We had plumbing repaired in May and that also became the opportunity to find a way to treat domestic wastewater so that it can be diverted into the garden. Since sewage systems aren’t centralised in our village, it is important that we treat our wastewaters locally and in a way that is responsible.

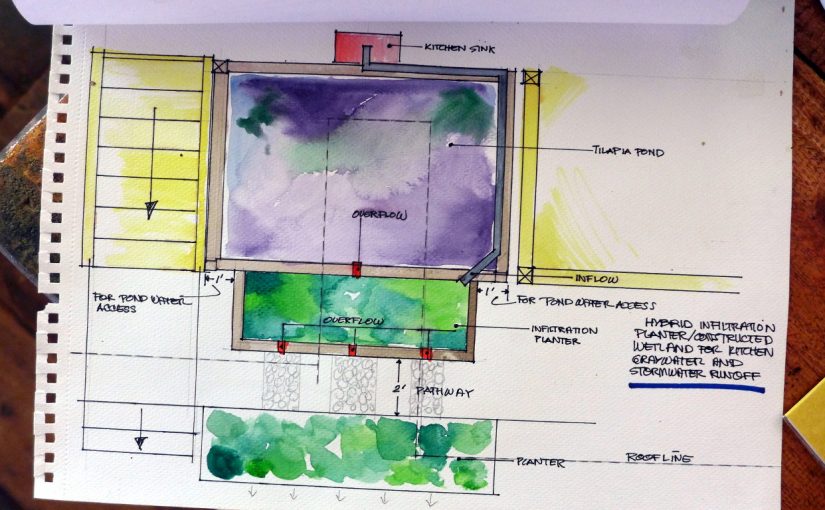
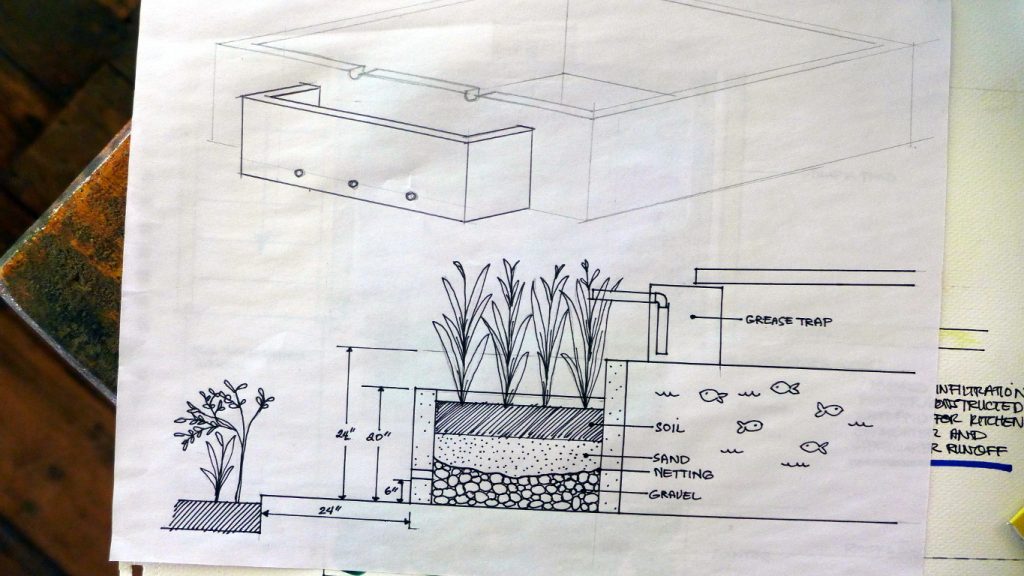
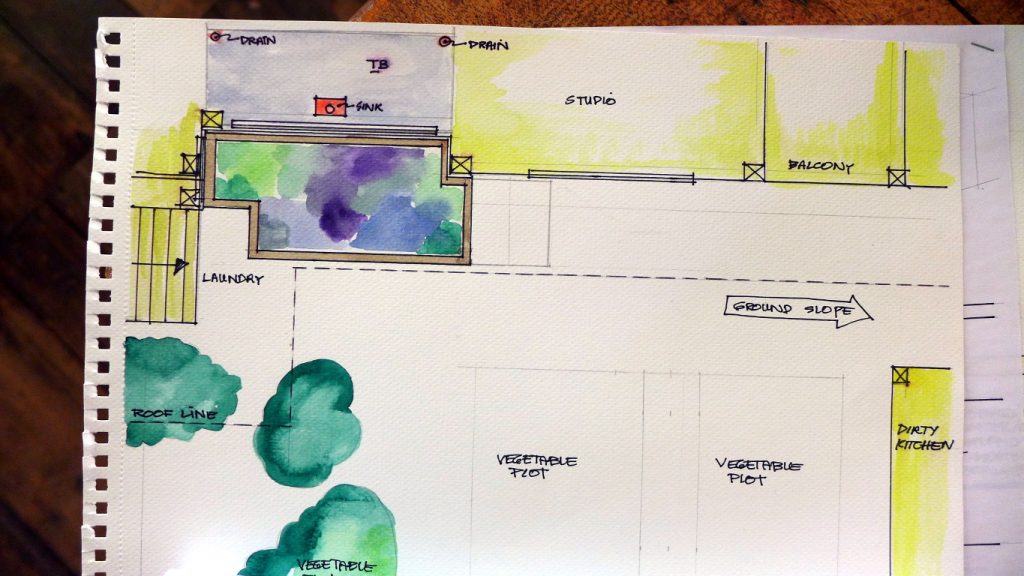
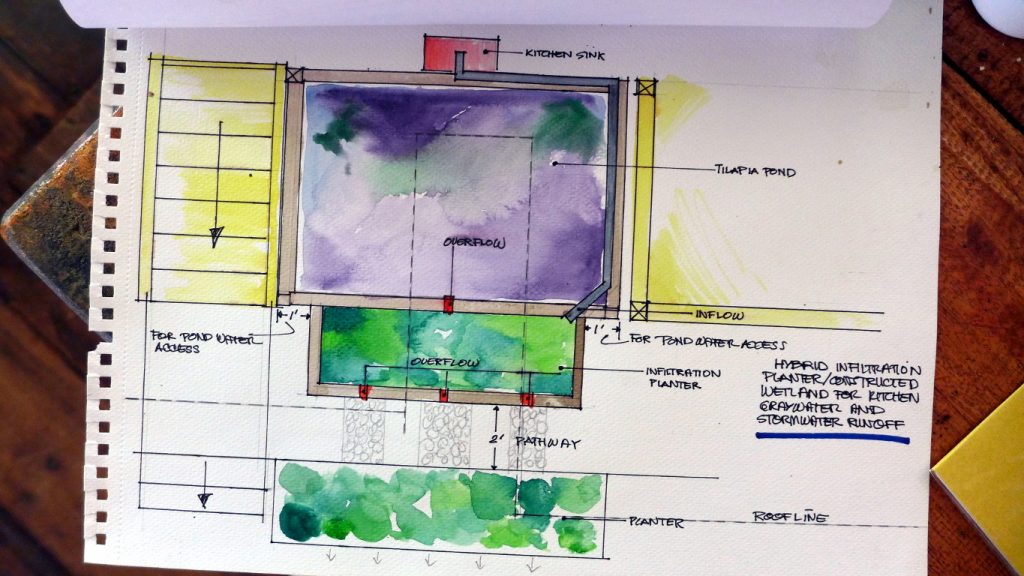
Above: Some of the drawings and plans we made to help build our greywater treatment systems.

In households in our village, domestic blackwater goes into a septic tank whilst greywater goes into the nearest empty plots. We have our own septic tank and our greywater went into a concrete water feature in the garden. This water feature often flooded especially in the rainy season, and wastewater just filtered into the ground. What we wanted was a system that not only filtered greywater, but also diverted it to good use in the garden. Additionally, we decided to separate kitchen greywater and bathroom greywater to lessen the load on our selected methods of treatment.

Treating Kitchen Greywater

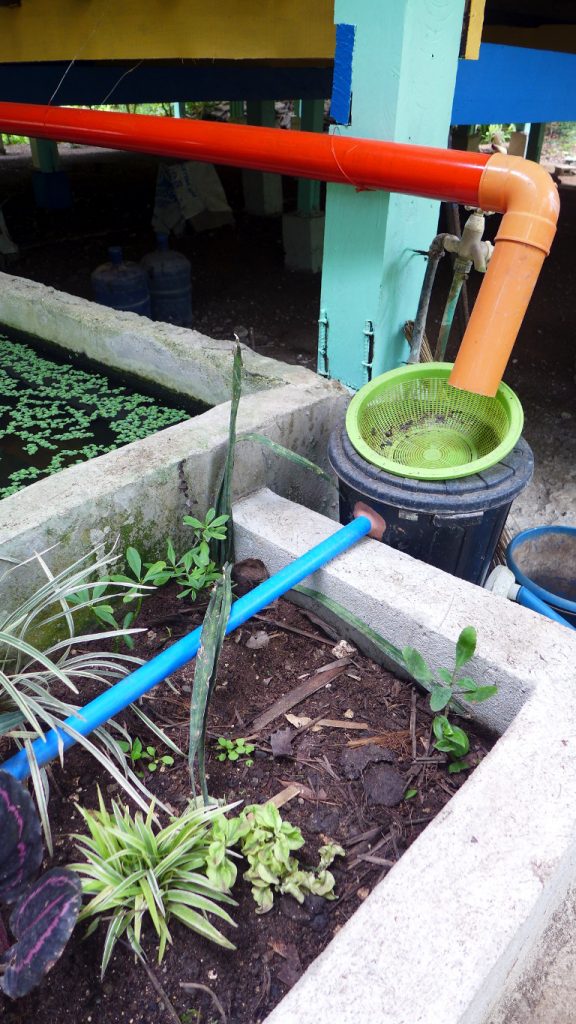
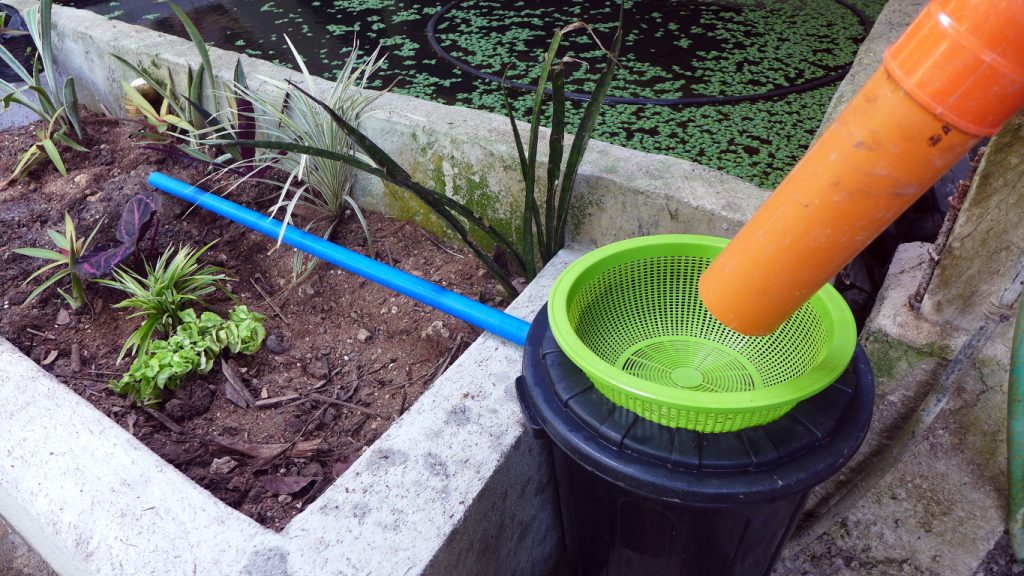
Kitchen greywater goes though a pipe and gets filtered in a DIY grease trap (refer to links to resources below to learn how to make a Grease Trap). From the grease trap, the water pours into a constructed wetland – or what may be called an infiltration planter – built next to the rainwater fishpond. The infiltration planter is filled with layers of gravel, a fine mesh netting, sand and soil. Plants are grown in the infiltration planter to help treat the greywater. As greywater filters down the planter, excess water flows out into a lower bed of plants.

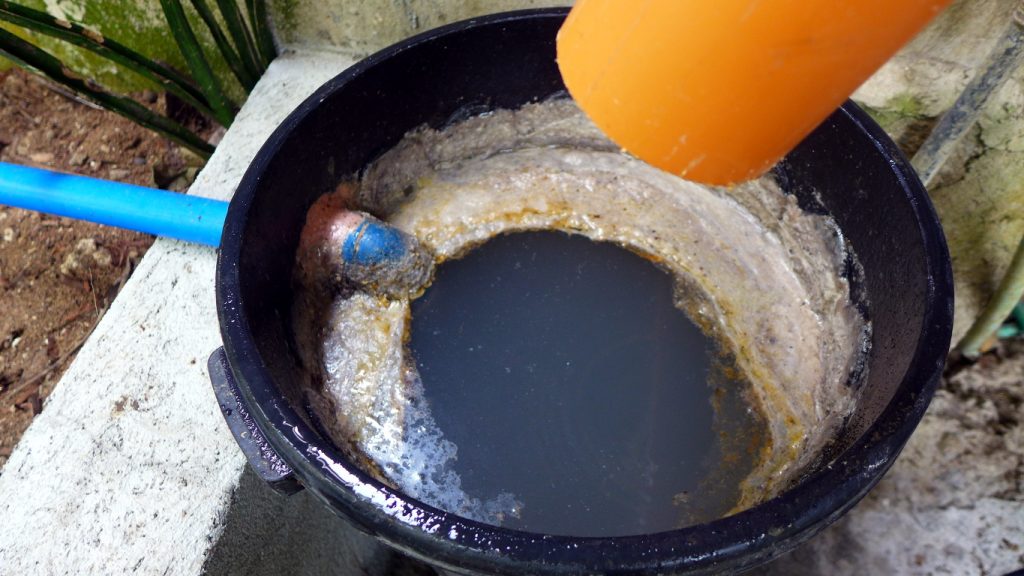
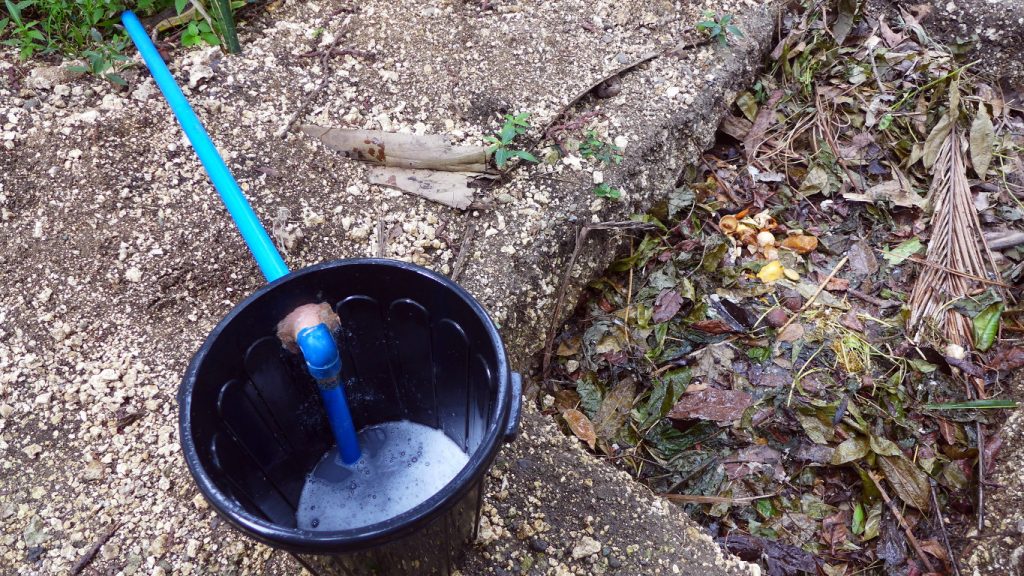
View of the Grease Trap.
Grease Trap – bucket with strainer on top to filter out food debris. Refer to links below on how to make a Grease Trap.
Accumulated grease in the Grease Trap.
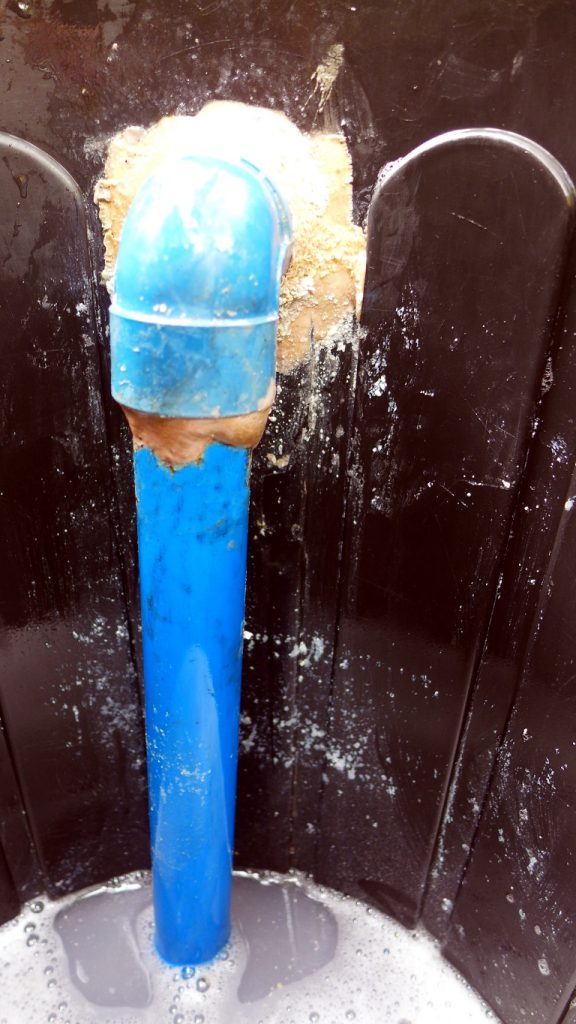
Internal construction of the Grease Trap – elbow and pipe sealed with Epoxy.
Grease Trap is cleaned next to the compost pit.

Treating Bathroom Greywater

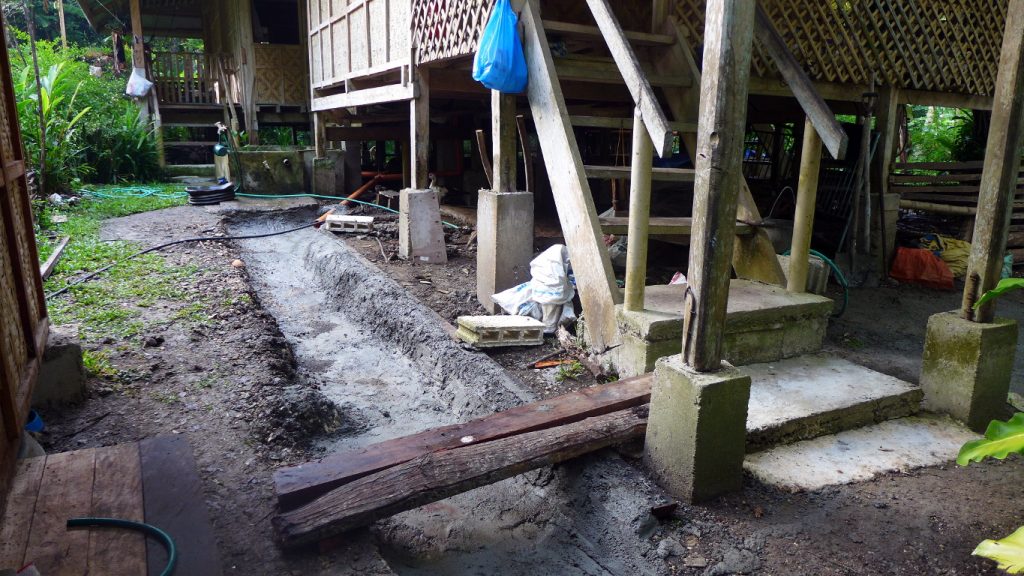
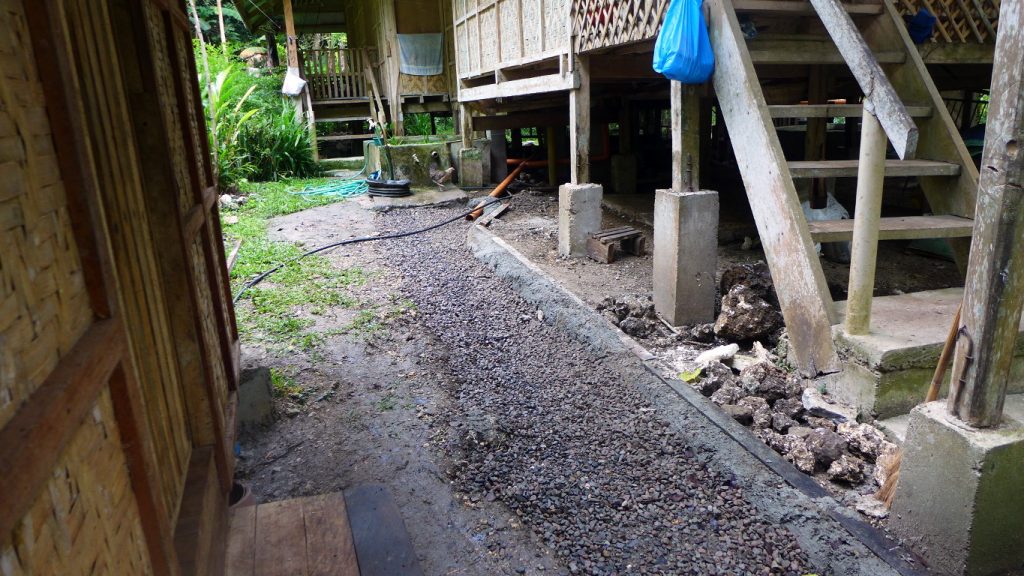
Bathroom wastewater consists of water from the shower and the bathroom sink. This water goes through a pipe and flows out over a gravel path with cement lining to prevent the water from seeping directly into the ground. The gravel path goes along the house, into the garden and down to the duck pond, some 10 or so meters away. The assumption is that the greywater – along with rainwater during the rainy season – would be filtered appropriately by the time it reaches the duckpond, at the same time reducing soil erosion, since the ground slopes naturally towards the duckpond.

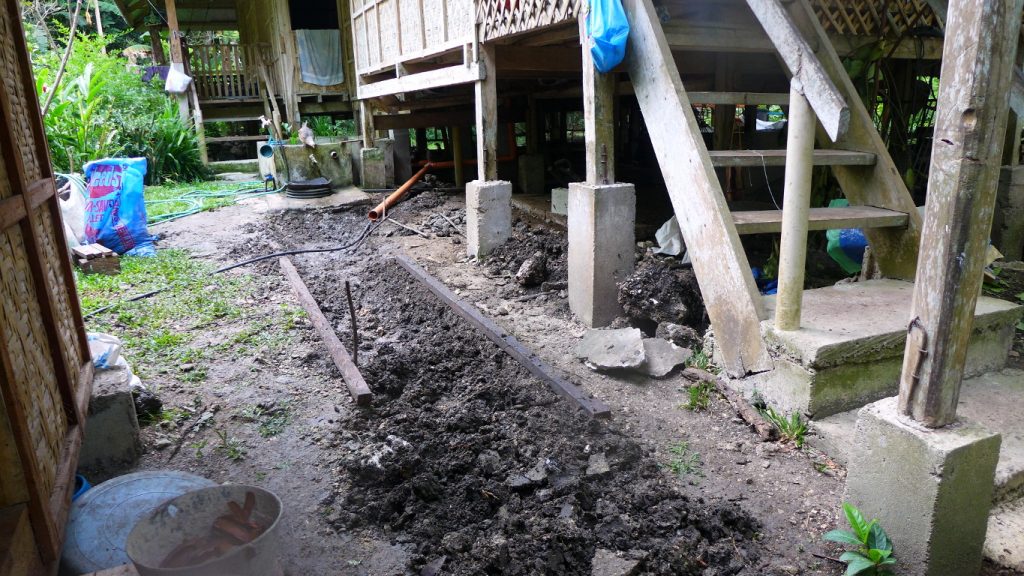
Ground has natural slope and the Gravel Path Filter is dug up in the direction of the slope towards the duck pond.
After digging, the path is cemented to prevent water from seeping into the ground along the house. The water needs to flow and get filtered by the gravel and ultimately flow into the duck pond.
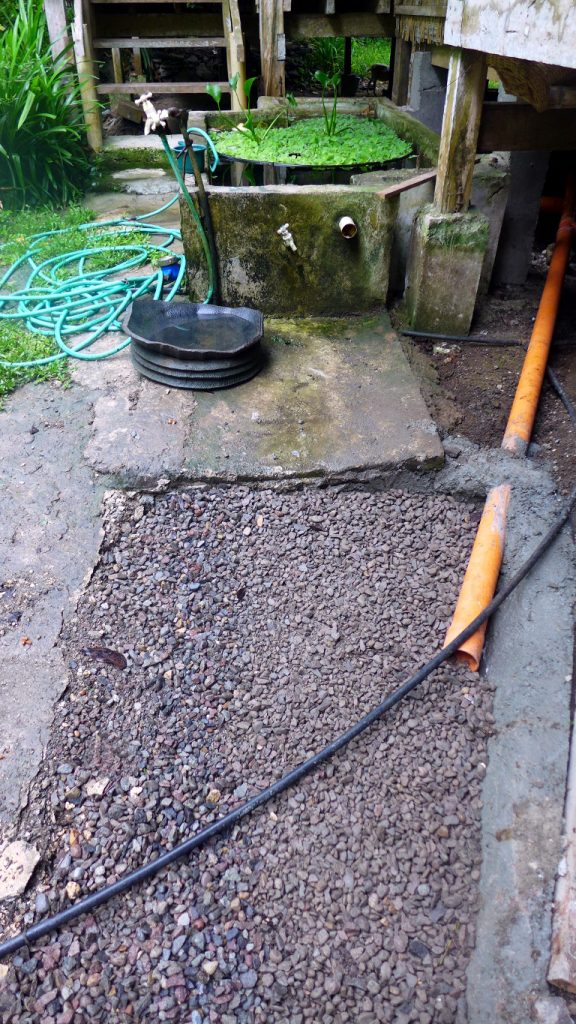
Gravel placed into the path. The orange pipe is the bathroom greywater outlet.
A closer view of the Gravel Path Filter. The reservoir/pond catches rainwater runoff from the roof of the house and overflows into the Gravel Path Filter.
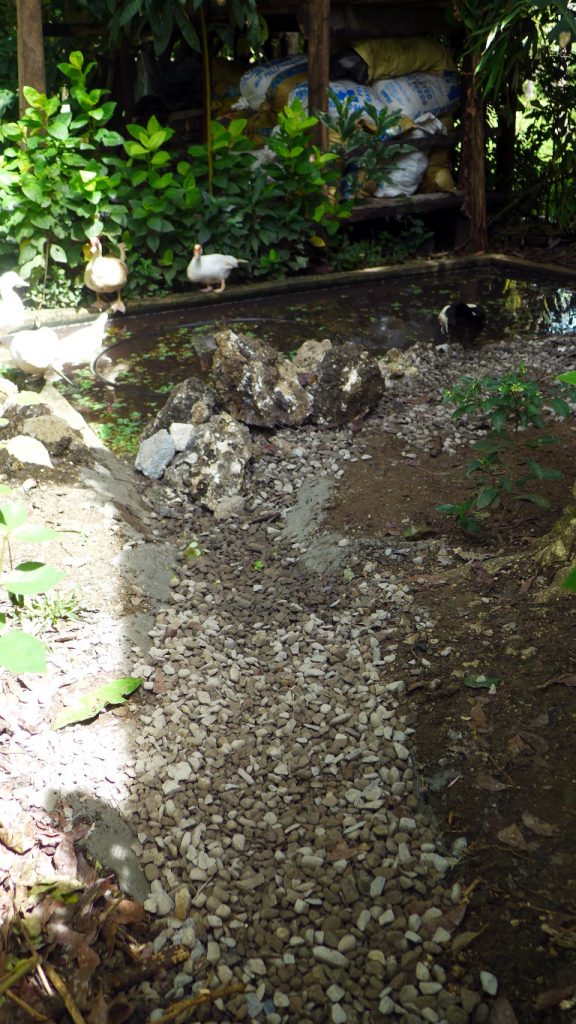
At the end of the Gravel Path Filter is the duck pond. Rocks are placed at the mouth of the Path to filter out larger debris.


The results

After nearly 3 months of use, together with the onset of the rainy season, our constructed wetlands are working beautifully! Plants are growing well in the infiltration planter, the gravel path has done away with mud and soil erosion in a large area along that side of the house. Some plants and grass have even started growing amongst the gravel. There is some odour coming from the infiltration planter but this is not irritating and the odour disappears very quickly. As more plants grow in the planter, we hope the odour will be further minimized. The DIY grease trap – a 5 gallon/10-liter capacity -requires some cleaning only every 2 months. The grease and debris collected is dumped into the compost pit.

Note that if any edible plants are placed in the infiltration planter, they should not be eaten.

Resources

If you are interested in building a constructed wetland system for greywater treatment in your own home, check first with local ordinances. Some municipalities, for example, that have centralised wastewater treatment facilities will not allow domestic greywater treatment because centralised wastewater (especially blackwater) treatment needs sufficient amounts of greywater for proper treatment.

If you are sure that constructed wetlands are allowed in your location, you can find basic information, designs, principles and examples of ecologically responsible wastewater treatment systems through the following resources. Our home set-up was inspired by these resources. Good luck!

Publications:

Websites:

Videos:

Duck Patrol

We keep ducks and native chickens together free range. Ducks rarely wander far from where they are fed and watered. Chickens can be more troublesome. Older roosters chase away the younger ones, hens pick fights with each other and with the ducks, killing chicks and ducklings that get caught in between.

But over the years, things have become more or less established, particularly, the hierarchy amongst the fowls. For one, there is less aggression amongst the ducks and between ducks and chickens. However, aggression amongst the chickens hasn’t really changed much, except for one thing: the ducks are putting a stop to it.

In the video above, a younger rooster challenges the older white rooster to a fight. A female duck steps in to stop the fight and she gets attacked by the younger rooster. So the drake steps in and the younger rooster runs off.

In the video above, two hens are fighting while some of the ducks look on. A female duck with 7 ducklings couldn’t stand it and decides to step in to stop the fight. The fighting doesn’t stop so she returns and manages to drive off the two hens.

And now, quite a common occurrence in the behaviour of young roosters recently, since the hens are often all already taken by the alpha rooster:

Planting Calendar for the Philippines

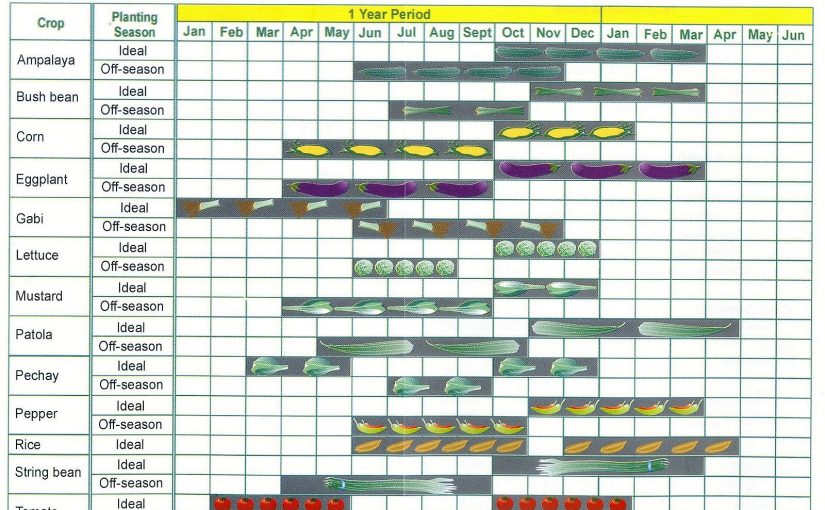
PLANTING CALENDAR (PHILIPPINES)

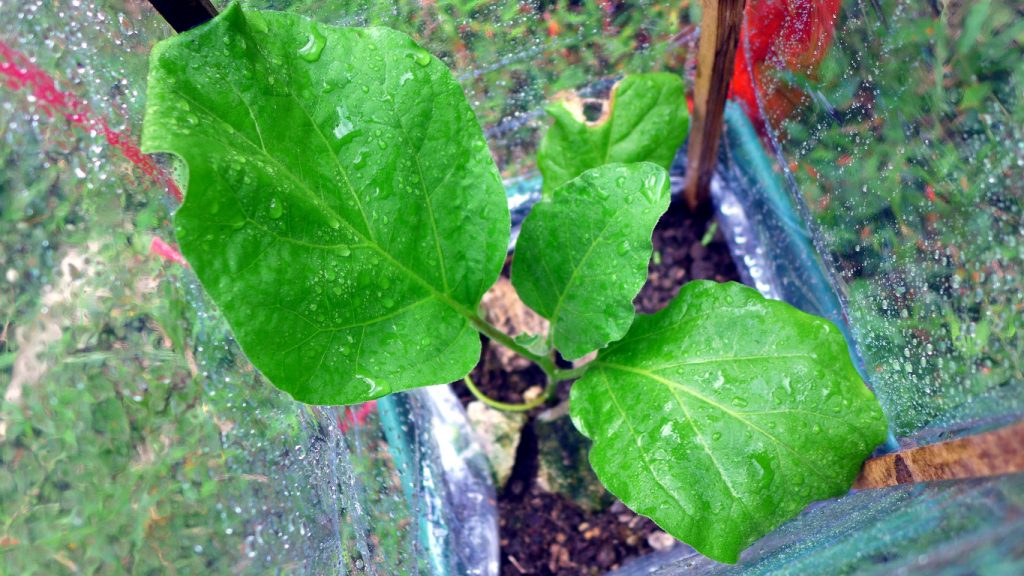
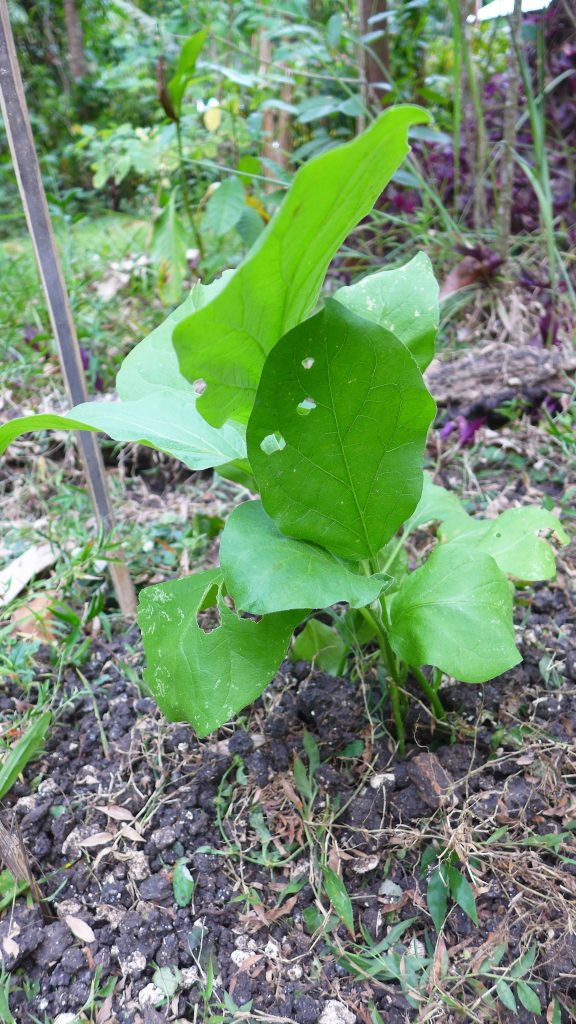
I started planting vegetables late last year. At the moment, I have beautiful looking tomato and eggplant plants but no fruits yet. So I thought that maybe I made the mistake of planting in the wrong time of the year. I have asked around about best times to plant but it seems that most backyard farmers here don’t really know and simply follow the rice growing season; generally, they start planting their seeds at the onset of the rainy season. This seems logical for backyard farmers who have no irrigation system for their crops. However, planting off-season may also mean the crops won’t be producing until the ideal conditions (especially rainfall and temperature) are available, or they may die or not produce at all.

So I looked for a Crop Planting Calendar for the Philippines and found some information. I hope this serves as a useful guide for you. I intend to follow this guide (I think that Bohol is type Three Climate) and compare with the results of my efforts from last year. Ultimately, if I am able to record the results of various experiments with growing seasons, I will hopefully come up with the ideal growing calendar for our specific location.  There may also be varieties of crops that may be planted off-season, and there are various technologies, such as irrigation, protected cropping or greenhouses, poly-tunnels, etc., that can be used to extend a crop’s growing season. I suggest you experiment, record your results to understand better the crops and conditions in your location.

TYPES OF CLIMATE

The Philippines has a wet and dry season and the relationship between these seasons create the 4 different types of climate in the country. Here are the 4 different types of climate in the Philippines:

TYPE ONE CLIMATE

Two pronounced wet and dry seasons: Dry from November to April; wet during the rest of the year. This covers the western part of the islands of Luzon, Mindoro, Negros and Palawan.

TYPE TWO CLIMATE

No dry season with very pronounced rainfall from November to January. The areas covered are Catanduanes, Sorsogon, the eastern part of Albay, the eastern and northern part of Camarines Norte and Camarines Sur, a great portion of the eastern part of Quezon, the eastern part of Leyte and a large portion of eastern Mindanao.

TYPE THREE CLIMATE

Season not very pronounced, relatively dry from November to April and wet during the rest of the year. Areas covered are the western part of Cagayan (Luzon), Isabela, Nueva Vizcaya, the eastern portion of the Mountain Province, southern Quezon, the Bondoc Peninsula. Masbate, Romblon, Northeast Panay, Eastern Negros, Central and Southern Cebu, part of Northern Mindanao and most of Eastern Palawan.

TYPE FOUR CLIMATE

Rainfall more or less evenly distributed throughout the year. The area covered: are Batanes Province, Northeastern Luzon, Western  Camarines Norte and Camarines Sur, Albay, Eastern Mindoro, Marinduque, Western Leyte, Northern Negros and most of Central, Eastern and Southern Mindanao.

Here is the Planting Calendar organized according to the Type of Climate:

TYPE ONE CLIMATE

Two pronounced seasons: Dry from November to April; wet during the rest of the year. This covers the western part of the islands of Luzon, Mindoro, Negros and Palawan.

RICE

Lowland (June to September and October to December)
Palagad (January to February)
Upland (April to June)

    CORN

Dry Season (October to January)
Rainy Season (May to June)

    PEANUT

Dry Season (November to January)
Rainy Season (May to June)

    BEANS

Batao (May to June)
Bountiful Bean (May to June and October to December)
Cowpea (May to June and October to November)
Cadius (May to June)
Mungo (July to September and November to February)
Patani (May to June and October to January)
Saguidillas (May to June)
Sitao (May to June and November to February)
Soybean (May to June)

    LEAFY VEGETABLES

Cabbage (October to December)
Cauliflower (October to February)
Celery (October to February)
Lettuce (August to January)
Mustard (August to January)
Pechay (October to December)

    FRUIT VEGETABLES

Ampalaya (May to July and October to January)
Cucumber (May to June and September to December)
Eggplant (May to June and February to September)
Melon (October to January)
Muskmelon (October to December)
Okra (May to June and October to December)
Patola (May to June)
Squash (May to June and October to December)
Tomato (October to January)
Upo (October to January)
Watermelon (November to January)

    ROOT VEGETABLES

Sweet Potato (May to June and December to February)
Gabi (May to June)
Ginger (May to June)
Radish (October to December)
Sinkamas (October to December)
Tugue (May to June)
Ube (May to June)
Cassava (May to June and October to December)

    OTHERS

Garlic (October to December)
Onion (October to December)
Sweet Pepper (May to June and September to December)
Condol (May to June and October to December)
Chayote (May to June and October to December)
Spinach (October to November)
Sweet Peas (October to December)
Carrot (October to December)
White Potato (October to December)
Talinum (May to June and October to December)
Kutchai (October to December)
Arrowroot (May to June)
Tapilan (May to June and September to October)
Beets (October to January)
Jute  (May to June)
Endive (September to October)
Snapbeans (October to December)


TYPE TWO CLIMATE

No dry season with very pronounced rainfall from November to January. The areas covered are Catanduanes, Sorsogon, the eastern part of Albay, the eastern and northern part of Camarines Norte and Camarines Sur, a great portion of the eastern part of Quezon, the eastern part of Leyte and a large portion of eastern Mindanao.

    RICE

Lowland (October to December)
Palagad (May to July)
Upland (June to August and September to November)

    CORN

Dry Season (March to May)
Rainy Season (January to February and August to September)

    PEANUT

Dry Season (January to February)
Rainy Season (May to June)

    BEANS

Batao (February to April
Bountiful Bean (January to May)
Cowpea (January to March and May to June)
Cadius (February to March)
Mungo (February to June)
Seguidillas (February to April)
Sitao (May to June)
Soybean (January to March)
Tapilan (January to March and August to October)

    LEAFY VEGETABLES

Cabbage (January to March)
Cauliflower (January to March)
Celery (January to March)
Lettuce (March to June)
Mustard (January to March)
Pechay (January to March)

    FRUIT VEGETABLES

Ampalaya (June to August and November to February)
Cucumber (March to April)
Eggplant (January to April and August to September)
Melon (March to June)
Muskmelon (March to June)
Okra (Whole Year)
Patola (March to September)
Squash (Whole Year)
Tomato (January to April and August to September)
Upo (November to March)
Watermelon (January to March)

    ROOT VEGETABLES

Sweet Potato (Year Round)
Gabi (Year Round)
Ginger (Year Round)
Radish (November to December and March to May)
Sinkamas (October to November)
Ube (Year Round)
Cassava (Year Round)

    OTHERS

Garlic (November to December)
Onion (December to March)
Sweet Pepper (February to March and August to September)
Chayote (February to March)
Spinach (January to March)
Sweet Peas (February to March)
Carrot (March to August)
White Potato (February to March)
Talinum (June to July and November to December)
Kutchai (March to July)
Arrowroot (June to September)
Beets (January to March)
Jute (January to March)
Endive (December to March)

TYPE THREE CLIMATE

Season not very pronounced, relatively dry from November to April and wet during the rest of the year. Areas covered are the western part of Cagayan (Luzon), Isabela, Nueva Vizcaya, the eastern portion of the Mountain Province, southern Quezon, the Bondoc Peninsula. Masbate, Romblon, Northeast Panay, Eastern Negros, Central and Southern Cebu, part of Northern Mindanao and most of Eastern Palawan.

    RICE

Lowland  (June to August)
Palagad (November to January)
Upland (April to June)

    CORN

Dry Season (October to December)
Rainy Season (April to June)
Third Crop (December to February)

    PEANUT

Dry Season (September to October)
Rainy Season (April to June)
Third Crop (December to January)

    BEANS

Batao (May to June)
Bountiful Bean (May to June and November to January)
Cowpea (May to June and November to December)
Cadios (May to June and October to November)
Mungo (December to January and September to October)
Patani (May to June and November to December)
Seguidillas (May to June)
Sitao (May to June and November to January)
Soybean (May to June and October to December)
Tapilan (May to June and November to December)
Peas (April to June and November to January)

    LEAFY VEGETABLES

Cabbage (April to June and October to December)
Cauliflower (October to December)
Celery (May to July and October to December)
Lettuce (April to May and October to December)
Mustard (May to July and October to December)
Pechay (May to June and October to December)
Spinach (May to June and October to December)

    FRUIT VEGETABLES

Ampalaya (May to June and November to December)
Cucumber (May to June and October to January)
Eggplant(May to June and November to January)
Melon (May to June and October to January)
Muskmelon (November to January)
Okra (May to July and October to December)
Patola (May to July and October to December)
Squash (May to June and October to December)
Tomato (October to January)
Upo (April to May and October to January)
Watermelon (October to January)

    ROOT VEGETABLES

Sweet Potato (April to June and November to January)
Gabi (May to July and October to December)
Ginger (May to June and November to December)
Radish (November to January)
Sinkamas (October too January)
Cassava (May to June)

    OTHERS

Garlic (October to December)
Onion (big bulb) (November to January)
Sweet Pepper (May to June and October to December)
Chayote (May to June and November to January)
Spinach (May to June and October to December)
Sweet Peas (April to June and November to January)
Carrot (October to December)
White Potato (October to December)
Talinum (May to June and November to December)
Kutchai (May to June and October to December)
Arrowroot (May to June and December to January)
Beets (November to January)
Onion (small bulb) (November to January)
Endive (November to January)

TYPE FOUR CLIMATE

Rainfall more or less evenly distributed throughout the year. The area covered: are Batanes Province, Northeastern Luzon, Western  Camarines Norte and Camarines Sur, Albay, Eastern Mindoro, Marinduque, Western Leyte, Northern Negros and most of Central, Eastern and Southern Mindanao.

    RICE

Lowland (May to July and August to October)
Palagad (November to January)
Upland (April to June)

    CORN

Dry Season (September to November)
Rainy Season (April to June)
Third Crop (December to February)

    PEANUTS

Dry Season (September to November)
Rainy Season (May to June)
Third Crop (November to February)

    BEANS

Batao (May to June)
Bountiful Bean (May to June and October to December)
Cowpea (May to June and October to December)
Cadius (May to July)
Mungo (May to June and November to January)
Patani (May to June and November to January)
Seguidillas (May to June)
Sitao (May to June and October to January)
Soybean (May to June and November to January)
Tapilan (November to December and June to July)
Peas (June to July and December to January)

    LEAFY VEGETABLES

Cabbage (June to September and October to January)
Cauliflower (April to July and September to January)
Celery ( June to July and January to February)
Lettuce (May to June and January to February)
Mustard (June to July and September to January)
Pechay (May to July and January to June)
Spinach (April to May)

    FRUIT VEGETABLES

Ampalaya (May to June and September to January)
Cucumber (June to July and October to December)
Eggplant (June to July and November to January)
Melon (November to January)
Muskmelon (November to January)
Okra (June to July and September to October)
Patola (May to June and December to January)
Squash (May to June and November to January)
Tomato (May to June and October to January)
Upo (April to May and October to January)
Watermelon (April to May and November to January)

    ROOT VEGETABLES

Sweet Potato (May to June and September to November)
Gabi (June to September and January to February)
Ginger (May to July)
Radish (May to July)
Sinkamas (May to June)
Cassava (May to June and December to January)

    OTHERS

Garlic (September to February)
Onion (September to January)
Sweet Pepper (May to June and September to January)
Chayote (May to June and October to December)
Spinach (April to May)
Sweet Peas ( June to July and December to January)
Carrot (May to June and November to January)
White Potato (October to December)
Talinum (June to July and January to February)
Kutchai (June to July)
Arrowroot (May to June and November to December)
Beets (June to July and November to December)
Onion (September to January)
Sesame (May to June and January to February)
Jute (April to May)

Not Sure Which Climate type?

If your location is not listed above and you’re not exactly sure which of the 4 is your climate type, you can use the illustration below as an initial guide. Happy farming!

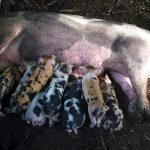
Number 3 Farrows!

Number 3 was serviced by Pinky Boar on November 13, 2017. Her expected date of farrowing was March 8 (115 days gestation). She farrowed March 9 (116 days). Number 3 has a history of farrowing on time and not earlier. This is her third parity.

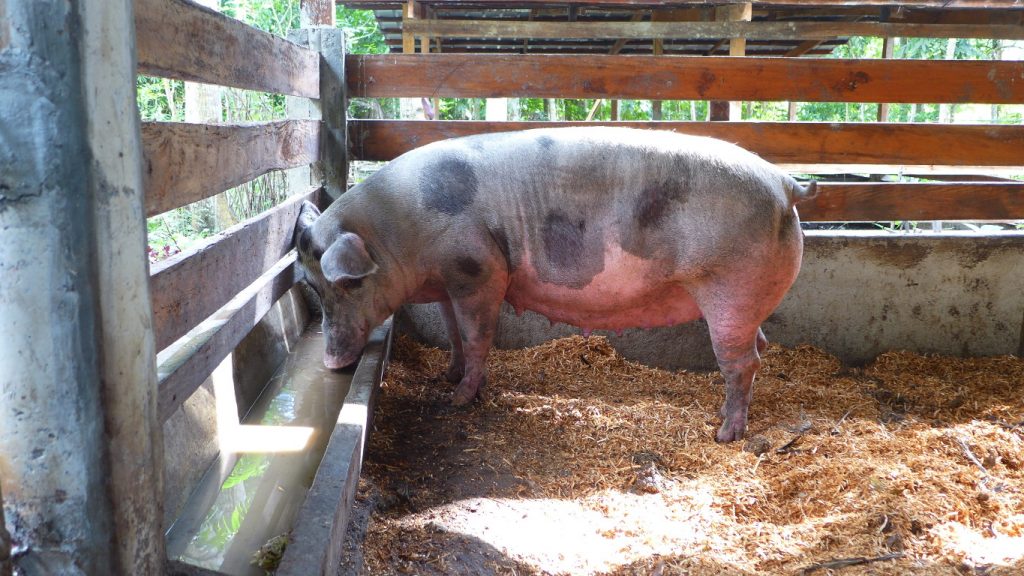
Number 3 in the maternity pen a week before farrowing.

First Few Hours – March 9, 2018

Around 1AM, I heard Number 3 making grunting sounds, not desperately asking for nesting material but since she usually does not grunt at this time of the night, I suspected she will be farrowing soon (12-24 hours).

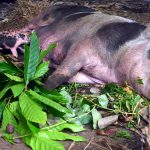
At 6:10AM, our usual feeding time, a small amount of feed was given. I saw that the dry banana leaves we gave her yesterday had been put in one corner of the pen, indicating she was already exhibiting nesting behaviour in the night, thus the grunting sounds several hours ago.

7:00AM, we gave her more dry banana leaves which she collects and starts nest-building, stopping to rest every now and then, until around 10AM.

12:00 noon, I saw a couple of piglets! Farrowing must have started at least 30 minutes earlier. Number 3 farrowed along the lower right corner of the pen near the wall, her head towards us and her back along the wall, so we couldn’t see the piglets as they come out. The piglets are only partly visible through the gaps along the pigpen wall.

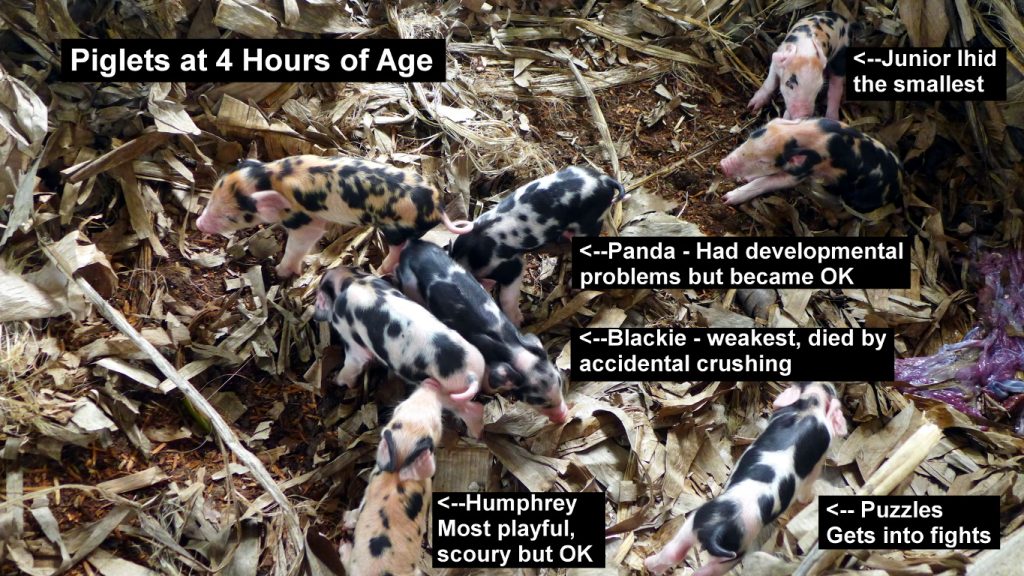
12:36PM, there appears to be 2 black and white piglets and 1 brown piglet, all suckling already.

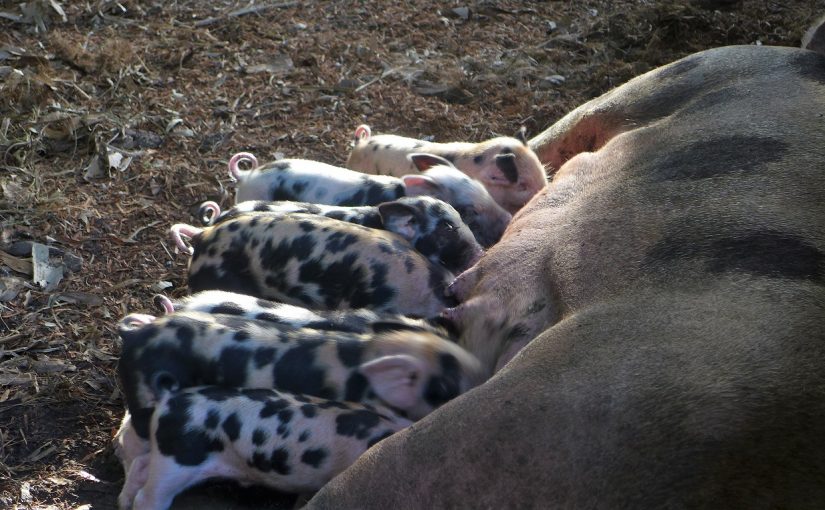
1:41PM, two hours old, first sign of piglets fighting at the teats, so Number 3 starts grunting which helps stop the piglets fighting. While grunting indicates milk flow, I think it also creates strong vibrations across the teats which calms down piglet fights.

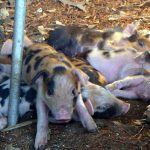
2:05PM, a rather lively piglet has started exploring the pen, then quickly returns to the mother.

2:30PM, a piglet travels even further towards the opposite side of the pen and stays there for a while, probably to urinate or defecate.

3:30PM, about 4 hours from the onset of farrowing, Number 3 gets up to eat the afterbirth, drinks water and eats about 400 grams of feeds. We counted 9 piglets born alive.

4:00PM, Number 3 lies on her right side, instead of her left side (her farrowing side) and this resulted in a lot of piglet fighting. The fighting subsides after a while. I think because Number 3 changed her first nursing position, the piglets need time to find their teats which can result in competition for teats.

Nursing takes place every hour, and Number 3 maintained this regimen for the rest of the nursing period.

Above Video: The light brown piglet climbing over the others is Humphrey. His teat is established at the first row upper left side of the mother, parallel to Panda, but he has trouble finding and attaching to it. He remains a very active piglet, but later he was the last to outgrow his scour. The black and white piglet that is unable to attach to a teat is Blackie. She gives up easily when she is unable to find her teat. She is the weakest in the litter and died due to accidental crushing. Panda is the rightmost piglet suckling. He had developmental problems but he attaches very well to his teat and grew to become one of the biggest piglets. The light brown piglet going to the mother’s head with Humphrey is Ihid and is considered the runt in the litter. He is growing fine.

Above Video: The weakest piglet, Blackie, is the focus in this video. I notice that the weakest piglets don’t engage in play and don’t actively explore the environment. Instead, they dig their snouts into the ground persistently. This is obvious even at only 2 days of age. In my experience with pigs of various ages, this persistent behaviour almost always indicated illness.

Some Observations on Farrowing

I was worried that Number 3 would have difficulty farrowing because she has a small vulva and thus possibly, a small cervix and birth canal. Interval between piglets in previous farrowing were 30-45 minutes.  However, this time, farrowing was much easier and shorter intervals (5-10 minutes) between piglets. I think it might be due to the fact that this is Number 3’s third parity and because of the addition of calcium in her diet. Calcium metabolism is also fairly good since Number 3 gets plenty of sunlight and exercise.

Above Video: Piglets at 5 weeks of age. Number 3 enjoys having her piglets and at the same time knows how to discipline them when they are fighting.

Above Video: Here, Number 3 is squeezing her way into the piglet creep space so she could eat their food. Because of this situation, we have decided to build a fenced area just outside the Piglet Escape Hatch. We call it the Piglet Restaurant where piglets can eat and drink safely, away from their mother. It is fenced to prevent ducks and chickens from eating the piglet’s food.

Some Observations on Lactation, Nursing and Sow-Piglet Interaction

Above Video: At 2-3 days of age, the piglets have discovered the Escape Hatch. They begin by exploring the soil outside. Later, they go further and eat soil and vegetation. It becomes their routine to go out and play after nursing. This gives the mother the chance to rest and relax inside the pen. Later, we built a fence around this area where the piglets can escape and eat, away from the mother.

Number 3 produced a lot of milk at farrowing. By 7 days of age, milk production became insufficient because I continued giving her only gestation feeds and the lactation feeds have not arrived. When piglets fight and ask the mother for more milk that is a sign there isn’t enough milk production. I tried to rectify the problem by giving Number 3 some papaya fruits and leaves, and by giving her lactating feeds once it became available. This solved the problem in 2-3 days.

However, because of the early scarcity in milk production, fighting among litter-mates became somewhat established and piglets also developed the habit of drinking water from the mother’s trough. Piglet behaviour is developed early on and can be difficult to change. So it is important to start with good conditions.

Number 3 tries to adjust her position during nursing so all piglets have access, except when she is too tired or too relaxed to notice there is trouble amongst piglets. Number 3 also gives special attention to weaker piglets, allowing them to access her teats or continue suckling while the others are asleep.

Above Video: 3-day old piglets fighting. This is Puzzles (black and white spots) and Brownie. These piglets are next to each other at the teats and will continue to fight at the teats until weaning. The mother disciplines pigs that fight.

Number 3 disciplines naughty piglets. When there is fighting at the teats and Number 3 gets hurt, she growls, gets up and nips the piglet that is causing trouble. She actually knows who is being naughty.

Video Above: On piglet discipline, relevant behaviour is in the first 15 seconds of this video. Piglets are 17-days old in this video. In the past several days there has been much fighting at the teats because of one or two very aggressive piglets. Notice the third piglet from the left fighting with the second piglet. Number 3 gets hurt, growls and gets up, then looks for the naughty piglet and nips her. This is how Number 3 disciplines her piglets – she actually knows who is at which teat and who is being naughty. Despite much fighting such as this, Number 3 never savaged any piglets and continued to nurse them. We don’t cut any piglets teeth.
On Crushing/Laying Over

One piglet was crushed accidentally on Day 3. This was a weak piglet, perhaps unable to nurse well on the first hour of birth. The accident was partly my fault. I gave Number 3 a small bath near the trough which motivated her to lie near the trough and nurse her piglets there. That area is a dangerous place for piglets, particularly when the mother gets up for feeding time. This was the same area where the weak piglet was crushed.

Above Video: Number 3 lies in the distance, then calls her piglets to suckle. This is a great technique, reducing risk of crushing or laying over. Piglets are 9 days old here and although Humphrey has already established attachment to his teat, he still likes humping over everybody!

Since a piglet was crushed, the rest of the litter have become more wary of the mother and they try to be more careful and alert. They actually try to avoid sleeping near the trough. The mother also discipline her piglets to keep them from going between her legs or under her teats while she is about to lie down. It is obvious that the mother is aware of the dangers of crushing/laying over. Interaction between sow and piglets is crucial for them to establish communication.

Caring for a Slow, Under-Developed Piglet

One piglet we call Panda is different from the others. He is of normal size but has a somewhat bulbous head, arched back and very slow in response and perception. Initially, he had a weak suckling reflex although he does attach tenaciously to his teat.  He doesn’t have the same gait as his siblings and has difficulty getting up.

Above Video: Here is Panda at 10 days of age. He has a somewhat bulbous head, a rigid gait, an arched back, and he doesn’t run around as actively as the others.

Above Video: Here, Panda has difficulty getting up while everyone else is already drinking milk!

Above Video: While piglets actively explore the garden, Panda seems to have difficulty. However, the excitement of the outdoors kept his spirits high and was daily motivated to get better. In the next couple of days, Panda progressively became better, catching up fast on his litter-mates.

Panda received Iron Drops like all his litter-mates. We don’t intervene during nursing and leave him to find his teat and develop good suckling reflex. Drinking water is provided for all piglets in an outside creep-space we call the “Piglet Restaurant.” All piglets are allowed to go out into the garden and eat soil, vegetation. Panda was the weakest but he always looked forward to going out into the garden. The outdoor exercise and abundance of soil and vegetation had a strong positive psychological influence on Panda. In fact, despite his ‘disability’, Panda was quite fierce in defending his teat from the other piglets. In 2-3 weeks, Panda is nearly as active as his litter-mates.

Above Video: 20 days old. Humphrey is a very playful piglet since the beginning. He is parallel to Panda at the teats. Early on, he developed the habit of humping Panda (and other litter-mates), thus his name. In this video, he harasses Panda and Panda squeals. The mother hears this and calls. Humphrey hears the mother and stops, to Panda’s relief, and pretends to have not done nothing wrong by rooting the ground.

Above Video: Here, the piglets are 16 days old, enjoying the garden. Panda is doing much better here and being able to go out into the garden and play has given him great psychological motivation to get better.

Some Observations on Post-Weaning

We separated Number 3 from her litter when the piglets were 45  days of age.  All the piglets remained active and playful and eat well. Scour began to set in at Day 2-3 of weaning and remained up to 6 days so I decided to intervene with probiotics. The scour is grey, watery, projectile of various degrees. All piglets remain active and eat well. Piglets were also given green banana leaves. There was some improvement but scour remained. So by Day 10 I decided to give Apralyte treatment, an anti-scour formula, for 5 days.

Day 2 of anti-scour treatment, piglet scours are thicker and not as watery as before and the appetite of the piglets increased immediately.  Day 3 of anti-scour treatment, the piglets began to get bigger as well. By Day 4-5, piglets are all back to normal, except for Humphrey who was the last to get rid of his scour completely.

Next time, I must include probiotics in sow/piglet water at least a week before weaning. Although the pigpen has been sprayed with Lactic Acid Bacteria solution, that didn’t seem sufficient. This batch of piglets also had less green forage because of the early provision of piglet crumble feed. We have had better cases in the past wherein piglets did not develop scouring as bad as this and they did not receive any piglet booster or crumble feed. I think next time I should implement early addition of probiotics in piglet diet before, the abundance of green forage and the late addition of any protein-rich feed (piglet booster, crumble, etc) in their diet.

Although we can look after piglets after they are born, I am getting more interested in how to make the piglets healthier while still inside the mother’s womb. Iron deficiency is one of the biggest hurdles. While I am still studying how adjustments to the mother’s diet may help, it is also possible to provide Iron rich forage and soil that piglets can nibble on as early as the first 3 days of life. The pigpen floor has more sawdust than soil, so while the Piglet Escape Hatch into the garden is crucial, I will need to put some clean soil into the pen for the piglets.

Some Observations on Extended Lactation/Nursing (up to 3 months)

Above Video: This is perhaps somewhat embarrassing but Ihid does not care! Here he is still suckling at nearly 9 weeks of age!

We allowed the runt Ihid to stay with Number 3 until he was 90 days of age. Ihid continued to suckle and the mother allowed him to do so but less frequently. Because Ihid was unable to eat well in competition with his mother he has not put on as much weight as his siblings. He developed no scouring.

However, after weaning, Ihid developed scouring after 3 days, so Apralyte treatment was given by day 5, for 3 days. Improvement is observed quickly. An acidifier, citric acid, is also added to Ihid’s water. This is now also given regularly to the adult pigs, ducks and chickens, to lower their gut ph, improve digestion, and reduce effluent. Less messy effluent also means minimized odor and easier management.

Above Video: Ihid the Runt finally weaned at nearly 3 months of age. He misses his mom. We are deciding to keep 2 piglets next time so the pigs don’t become too lonely.
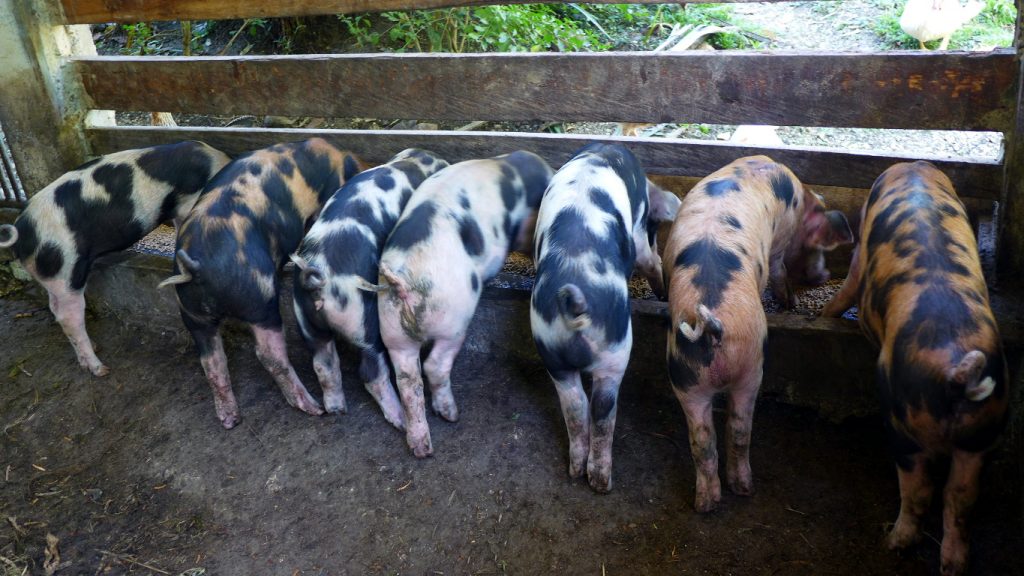
Piglet Weights at Post-Weaning (55 days): 25-16 kilos. The females weigh less than the males. Panda weighed 22 kilos.

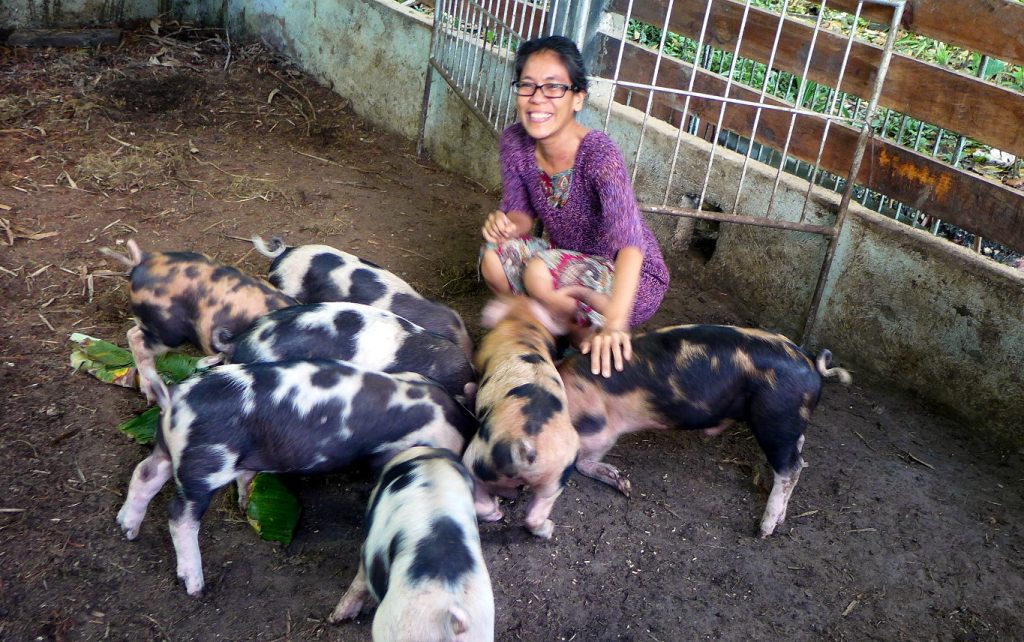
Four piglets were sold to two neighbours  and three piglets were sold to an orphanage in Dauis. We keep Ihid the Runt. Although we have done this many times before, I still miss the piglets every time! I love each and every single one of them! 🙂